


-270x270.jpg)


-270x270.jpg)


-270x270.jpg)


Latest


")
")

-270x270.png "Stoneware Textured Vase - Case of 4")
-270x270.jpg "Stoneware Tall Latte Mug - Case of 4")


-270x270.jpg "Vintage Christmas Tree Bowl - Case of 4")


Featured

Ceramic Bisque Bunny Gnome
MB1598 Bunny Gnome in ready to paint, cone 04 Low-Fire Ceramic Bisque
4 L x 5.5 W x 9.75 H

Ceramic Bisque Large Mushroom Lantern
MB1644 - Large Mushroom Lantern in Ceramic Cone 04 Bisque
7 L x 7 W x 9.5 H
This item is unpainted.
You are purchasing an unfinished, Ready to Paint, Piece of Ceramic Pottery
-270x270.jpg "Speedball Bose Base Blue")
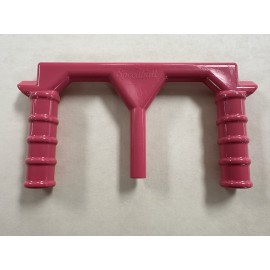
Speedball Bose Base Blue
Speedball
Boss Base
The Speedball Boss Base, developed in
partnership with professional potter, Rich Brown, and inspired by tools and
traditions of North Carolina production potters, this amazing tool allows for
the ultimate ergonomic experience while delivering unmatched consistency and
ease. Adding efficiency and precise results to any studio setting, the Boss
Base will become your tool of choice to easily open your small cups, mugs or
plates while ensuring a uniform bottom to every piece. Available in six vibrant
colors (Red, Blue, Orange, Green, Pink, Purple); 3/8" size.

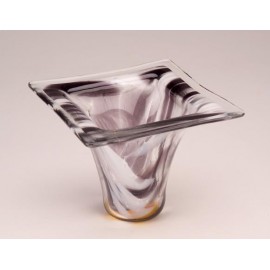
Louisiana Bayou Floating Glaze by Spectrum
1451 Louisiana Bayou Floating Glaze by Spectrum
16-ounce container
AP, non-toxic, Dinnerware Safe
.jpg)
The Cone 4/6 Floating Glazes are all lead-free and dinnerware safe.
They require 2-3 coats for full coverage.
Samples are at Cone 5 and changes in temperature can produce variations on the
appearance
")
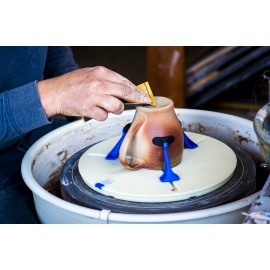
Edger Rib 1 Large (Red)
Edger Ribs
Xiem Edger Rib 1 Large (Red) is made of high-quality
anodized aircraft aluminum. Our Edger
Ribs provides a simple solution for creating quick footing designs and decorating
textured surfaces to your thrown pottery.
With Edger Ribs, enhancing your pottery surface with a
creative touch has never been easier.
These ribs are made of anodized aluminum, ensuring long-lasting use and
rust resistance.
They come in four unique styles with each featuring three precision
edging patterns and in three different sizes (small, medium, and large) to
select from.


.jpg)

.jpg)
